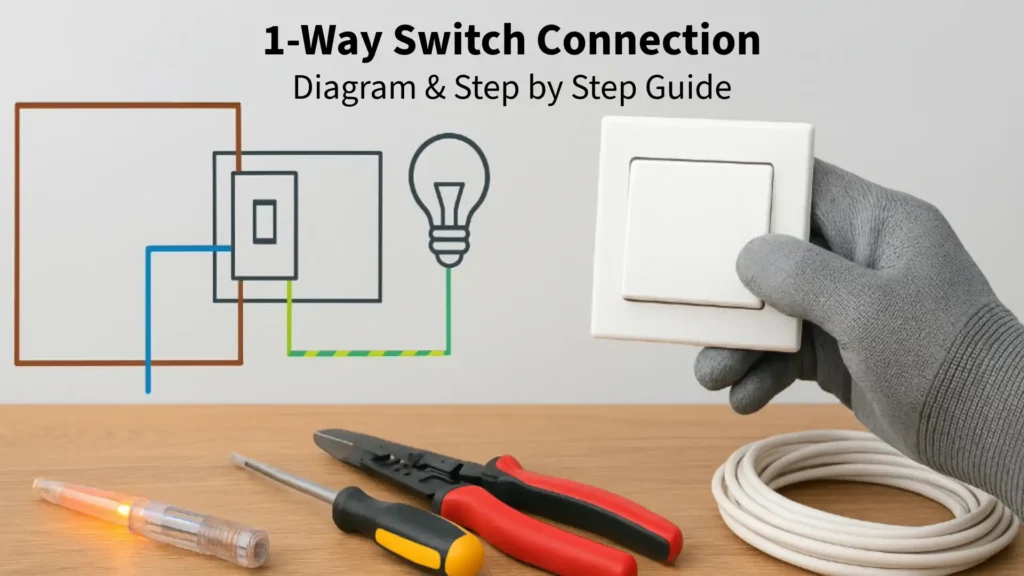
1-Way Switch Connection: Diagram, Step-by-Step Guide
Welcome back to our Electrical Learning Series! If you’re just joining us, this is Level 2, Part 5, where we’re diving deeper into practical wiring skills. In Part 1: What is Electricity? – A Beginner’s Guide, we covered the basics of how electricity works. Part 2: Electrical Safety – A Beginner’s Guide, emphasized staying safe around electrical projects. Part 3: Basic Electrical Tools and Their Uses, introduced essential tools, and Part 4: Wiring Basics – Introduction to House Wiring, got us started with home wiring fundamentals.
Today, we’re building on that foundation by exploring the 1-way switch connection—also known as a single-pole switch. This is the simplest way to control a light or appliance from one location, like flipping on your bedroom light from the doorway. It’s a great starting point for beginners before we move to more advanced setups, such as the 2-way switch in Part 6: 2-Way Connection
Whether you’re a DIY enthusiast or just curious about home electrical systems, this guide will walk you through everything with clear explanations, a simple diagram, and step-by-step instructions. Let’s get wired up safely and correctly!
Let’s flip the switch and get started! ⏬
What is a 1-Way Switch?
A 1-way switch (or single-pole single-throw switch) is the most common type of light switch in homes. It allows you to turn a device ON or OFF from one single point. Think of it as a basic on/off controller—no fancy features, just straightforward functionality.
In electrical terms: ⏬
- It connects or disconnects the flow of electricity in a circuit.
- It’s typically used for lights, fans, or outlets in rooms where you don’t need control from multiple spots.
- Key components include the switch itself, wires (live, neutral, and earth/ground), and the load (like a bulb).
Understanding this setup is crucial because it forms the basis for more complex wiring, like the 2-way switches we’ll cover next. If you’ve grasped the wiring basics from Part 4, you’re ready to tackle this!
Tools and Materials You’ll Need
Before we start, gather your supplies. This builds directly on Part 3: Basic Electrical Tools and Their Uses [blocked]. Here’s what you’ll need for a basic 1-way switch installation:
- Tools:
- Materials:
- 1-way switch (single-pole)
- Electrical wires: Live (hot), neutral, and earth/ground (usually 1.5mm² twin and earth cable)
- Junction box or switch box
- Light bulb or fixture (for testing)
- Wire connectors or terminal blocks
Always buy quality, certified materials from a reputable supplier to ensure safety and compliance with local electrical codes.
Safety First: Essential Precautions
Electricity can be dangerous if mishandled, so let’s revisit Part 2: Electrical Safety – A Beginner’s Guide. Never skip these steps:
- Turn OFF the power at the main circuit breaker and confirm it’s off with a voltage tester.
- Wear insulated gloves and safety goggles.
- Work in a dry environment—avoid water or damp areas.
- If you’re unsure about anything, consult a licensed electrician. This guide is for educational purposes; professional help is recommended for actual installations.
- Double-check local regulations, as wiring colors and codes vary.
Safety isn’t just a suggestion—it’s your first line of defense!
Step-by-Step Guide to Wiring a 1-Way Switch
Now, the fun part! We’ll assume you’re wiring a simple light circuit from scratch in a controlled, practice setting (like a workbench). If you’re working on an existing home setup, isolate the circuit first.
Step 1: Plan Your Circuit
- Identify your power source (e.g., a fuse box or outlet).
- Decide where the switch and light will go. The switch interrupts the live wire to control the light.
- Sketch a rough plan: Power → Switch → Light → Back to neutral.
Step 2: Prepare the Wires
- Cut your wires to length (add extra for flexibility).
- Strip about 1cm of insulation from each end using wire strippers.
- Remember wire colors (standard UK/EU):
- Brown: Live (hot)
- Blue: Neutral
- Green/Yellow: Earth/ground
Step 3: Install the Switch Box
- Mount the switch box securely on the wall or surface.
- Feed the wires through the box’s entry points.
Step 4: Connect the Wires to the Switch
- A 1-way switch has two terminals: COM (common) and L1 (or similar labeling).
- Connect the incoming live wire (from power source) to the COM terminal.
- Connect the outgoing live wire (to the light) to the L1 terminal.
- Secure with screws and ensure no bare wire is exposed.
Step 5: Wire the Light Fixture
- At the light: Connect the live wire from the switch to the light’s live terminal.
- Connect the neutral wire from the power source directly to the light’s neutral terminal (bypassing the switch).
- Connect all earth wires to their respective grounds for safety.
Step 6: Test the Circuit
- Turn the power back on.
- Flip the switch: The light should turn on and off smoothly.
- Use a voltage tester to check for any live exposed parts.
If it doesn’t work, recheck connections—loose wires are a common issue.
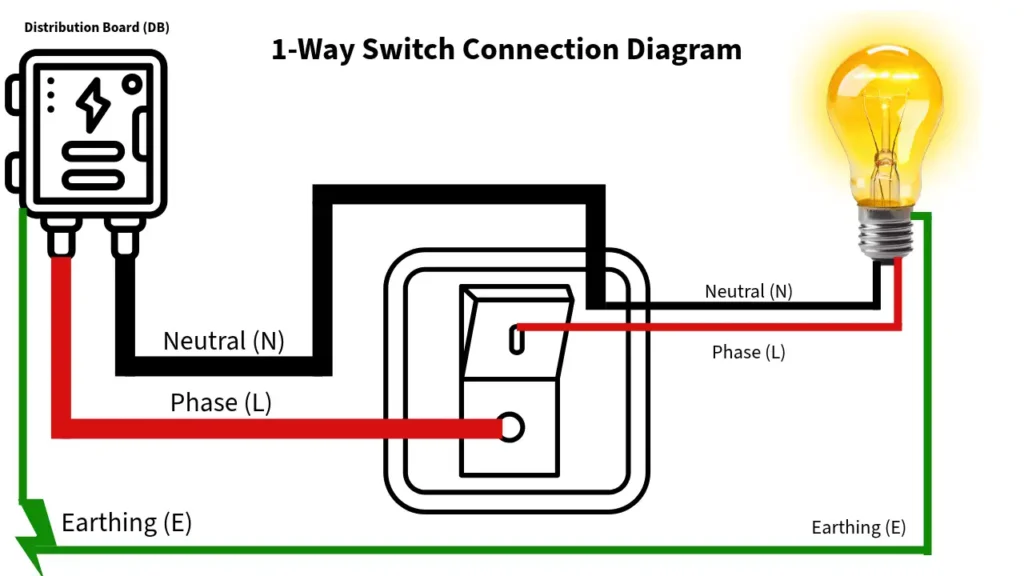
1-Way Switch Connection Diagram

Visuals make everything clearer! Below is a simple text-based diagram of a basic 1-way switch circuit. Imagine this as a loop:
Power Source (Fuse Box)
    |
    | Live (L)(Red 🔴) ----> Switch (COM terminal)
    |                     |
    |                     | Live (Red) ----> Light Bulb (Live terminal)
    | Neutral (N) (Black ⚫) --------------------------> Light Bulb (Neutral terminal)
    | Earth (E) (Green 🟢) --------------------> Earth all components
    |
    V
Ground / Earthing (E)
Description: Electricity flows from the power source through the live wire to the switch. When the switch is ON, it completes the circuit to the light. The neutral wire returns the current, and earth provides a safe path for faults. For a visual image, search for “1-way switch wiring diagram” or check online resources—but always cross-reference with this guide.
This setup is ideal for single-control scenarios. Pro tip: Label your wires to avoid confusion!
Common Mistakes and Troubleshooting
Even beginners make errors—here’s how to avoid them:
- Mistake 1: Switching the neutral instead of live. This can leave the circuit energized even when “off.” Always switch the live wire.
- Mistake 2: Loose connections. Tighten screws firmly but not overly so.
- Troubleshooting: Light doesn’t turn on? Check for power at the source, test the bulb, and ensure wires are secure. Flickering? Could be a faulty switch—replace it.
- If issues persist, turn off power and inspect step by step.
Remember, practice on a low-voltage setup first to build confidence.
Conclusion: of 1 Way Switch Connection
Congratulations! You’ve just learned how to wire a 1-way switch with a clear diagram and step-by-step guide. This fundamental skill is the building block for home electrical projects, tying back to everything we’ve covered in Levels 1 and 2 so far.
Ready for more? In Part 6: 2-Way Connection [blocked], we’ll explore controlling a light from two locations—like at the top and bottom of stairs. It’s a natural progression from today’s lesson.
If you have questions or want to share your wiring success stories, drop a comment below. Stay safe, keep learning, and subscribe for more beginner-friendly electrical tips. Remember, when in doubt, call a pro!
Last Updated: [24/08/2025]. This post is part of our ongoing Electrical Learning Series.